Easy Retail Flow › Products › How to Add New Products?
¶ How to Add New Products?
A step-by-step visual guide to adding and managing your inventory in the portal.
¶ 1. Accessing the Product List
The process of adding a new item begins in the Product List section. Ensure your inventory is up to date by following the steps below to initiate a new product entry.
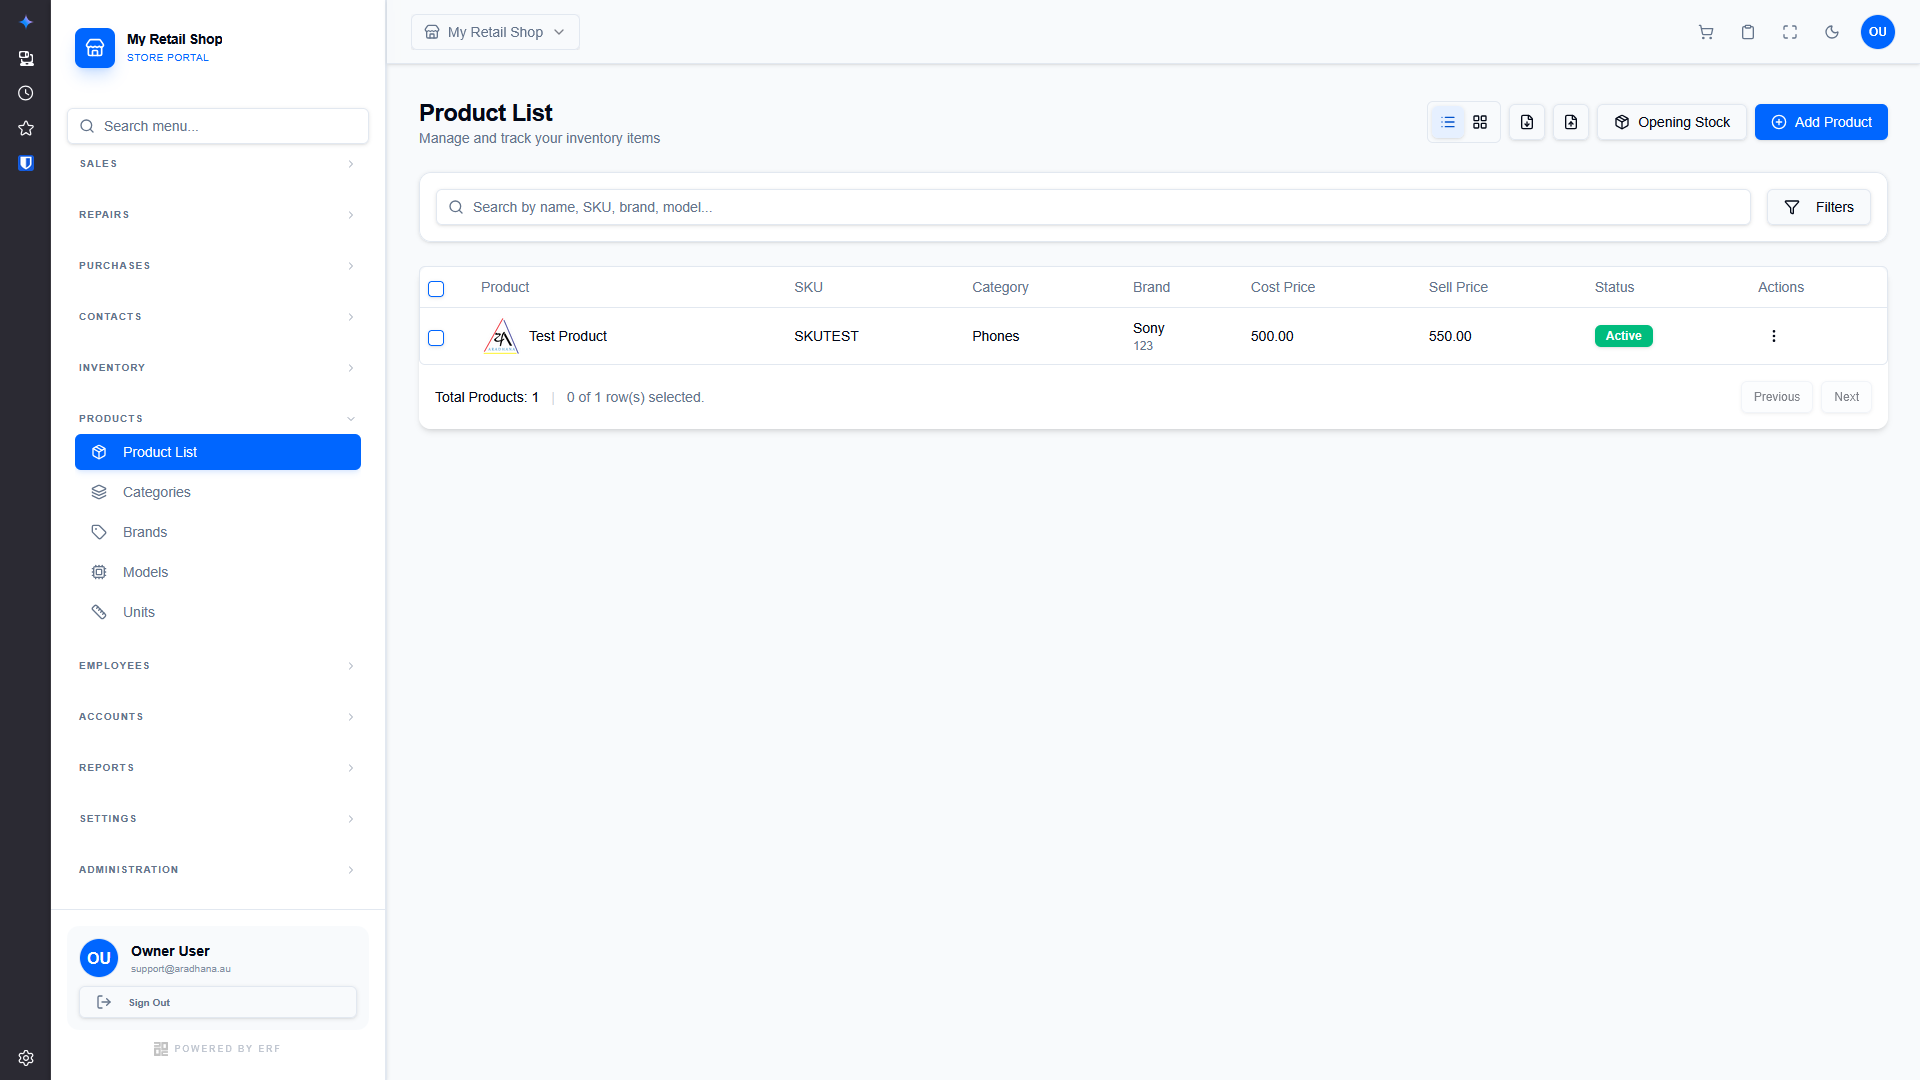
Figure 1 — The main Product List interface.
- Navigate to Products — On the left-hand sidebar, locate and click the Products dropdown menu.
- Select Product List — Click on Product List to view your current inventory.
- Initiate Add Flow — Click the blue + Add Product button located in the top-right corner of the page.
¶ 2. Product Configuration: General Info
Once you click 'Add Product', you are taken to the detailed configuration screen. The first tab, General Info, contains the primary identification and classification details for your product.
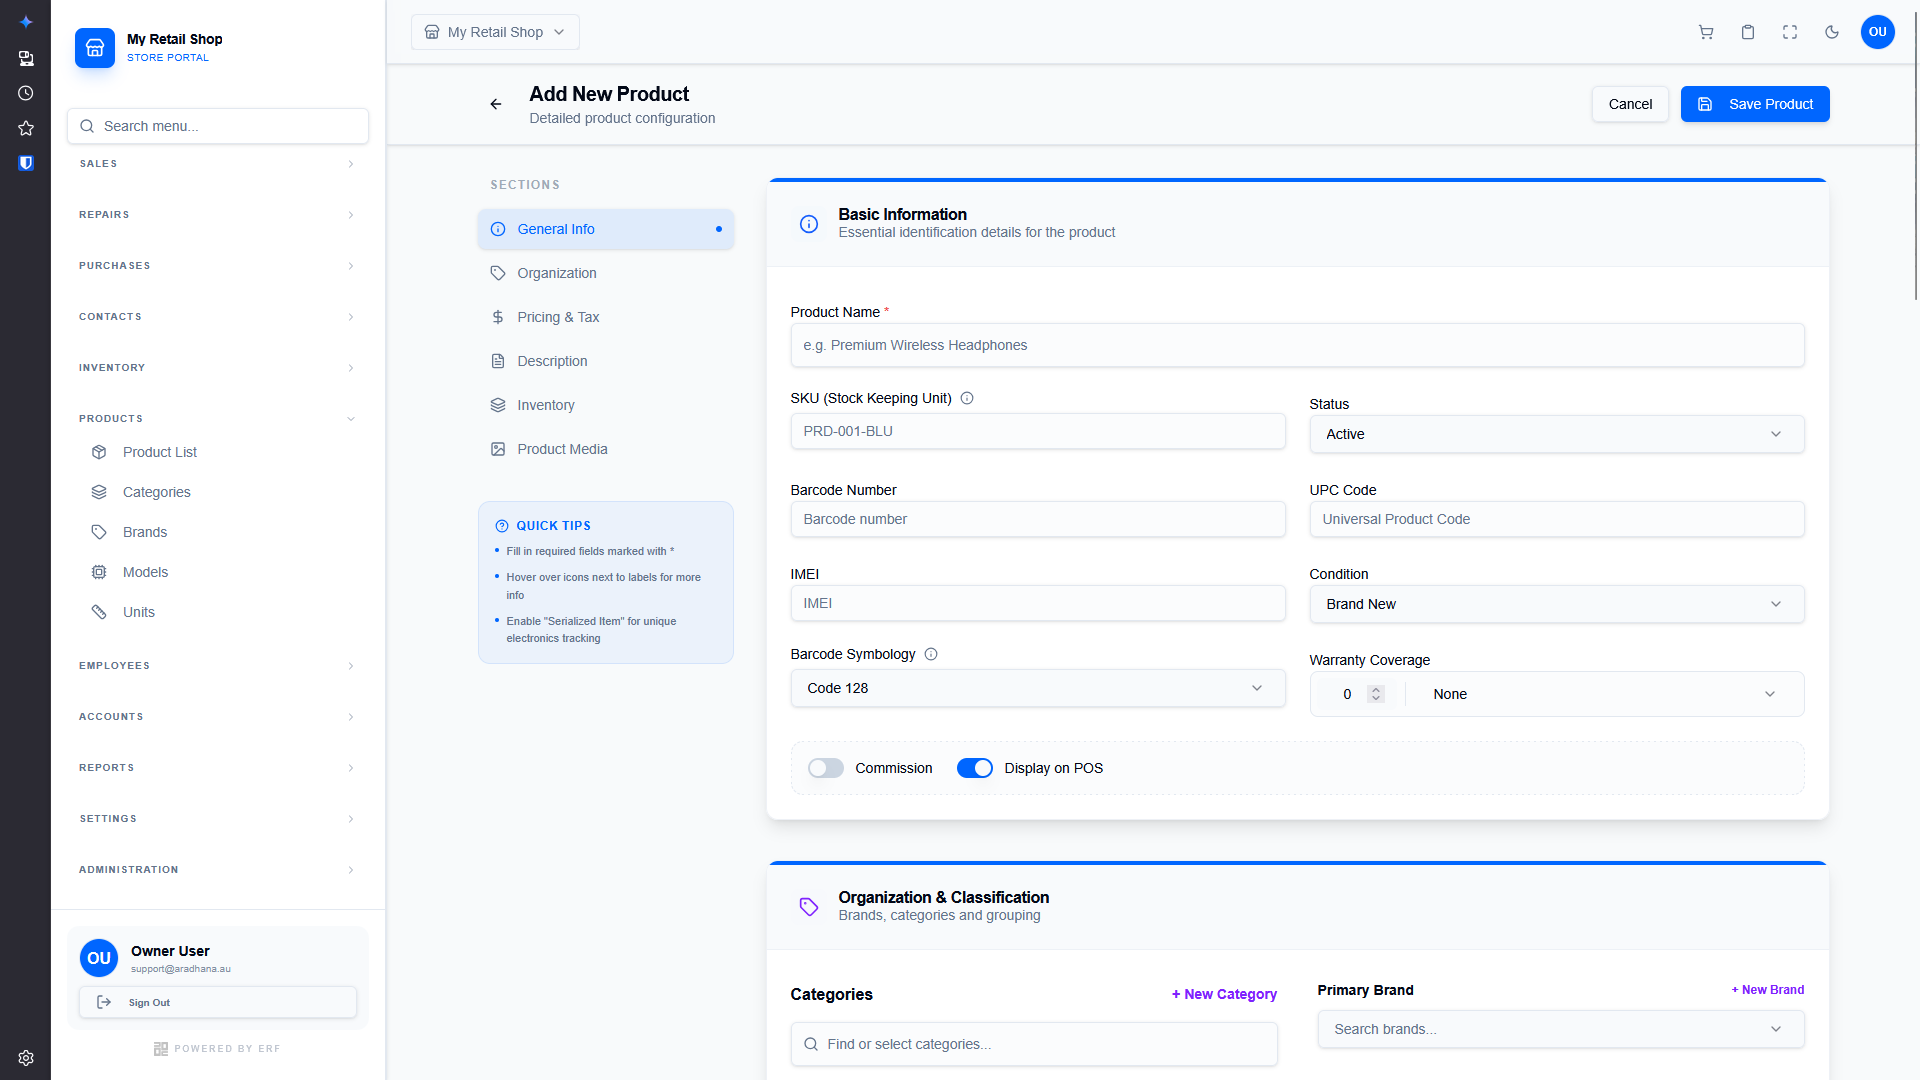
Figure 2 — The General Info tab and Basic Information section.
¶ 2.1 Basic Information
This section captures essential identification details that help track the product across the system and on your point-of-sale (POS) terminal.
| Field Name | Description & Importance |
|---|---|
| Product Name * | The primary name of your item (e.g., "Premium Wireless Headphones"). Mandatory field. |
| SKU (Stock Keeping Unit) | Unique alphanumeric identifier for inventory tracking. |
| Status | Set to Active to make it available for sale, or Inactive to hide it. |
| Barcode / UPC / IMEI | Standard product codes. IMEI is particularly useful for tracking electronics. |
| Condition | Specify if the item is Brand New, Refurbished, or Used. |
| Warranty Coverage | Define the duration and type of warranty offered with the product. |
| Toggles |
Commission: Enable if sales of this item earn staff commissions. Display on POS: Toggle off if this is a web-only or back-office item. |
¶ 3. Product Configuration: Organization
The second tab, Organization, is used to classify your product and set its base financial parameters. Proper classification ensures accurate reporting and easier inventory management.
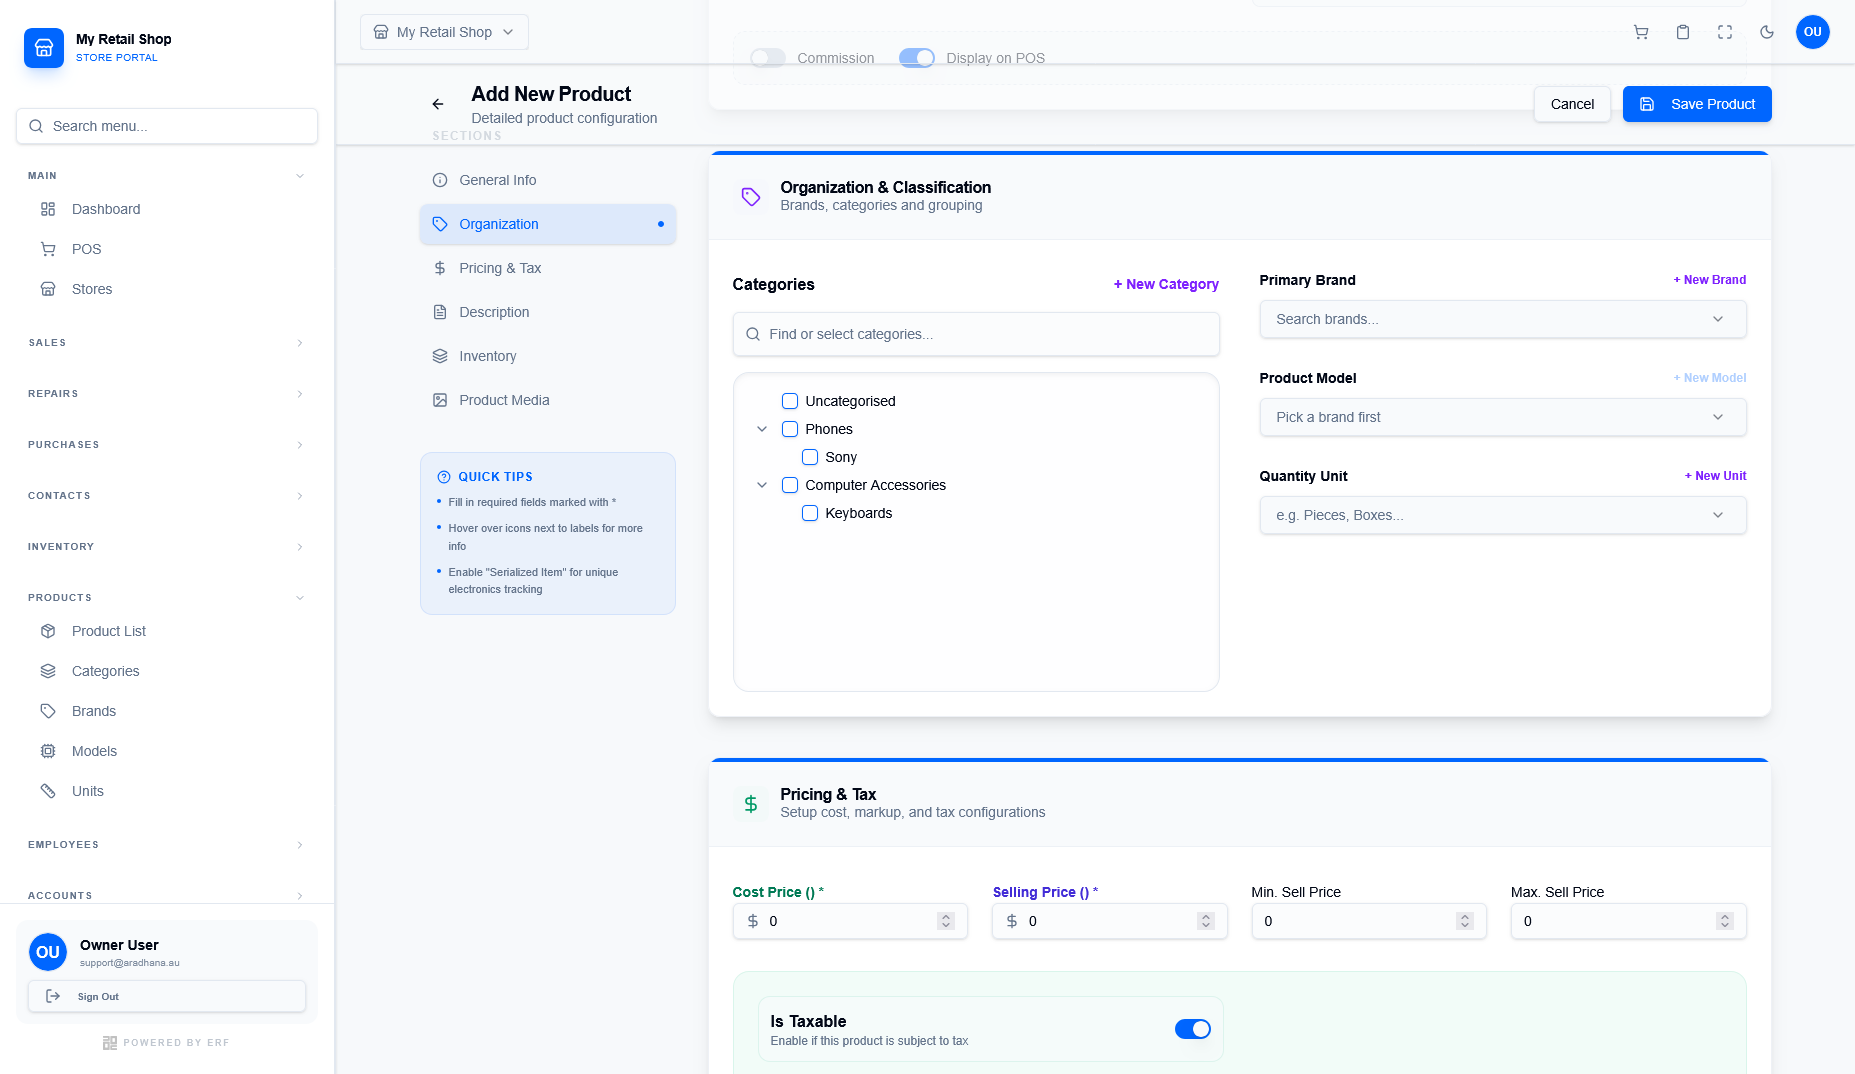
Figure 3 — Organization and Pricing configuration.
¶ 3.1 Organization & Classification
Group your products logically to help both staff and customers find what they need.
| Field Name | Description |
|---|---|
| Categories | Select the appropriate category (e.g., Phones). You can also create a + New Category on the fly. |
| Primary Brand | The manufacturer or brand of the product (e.g., Sony). |
| Product Model | Specific model name or number related to the brand. |
| Quantity Unit | The unit used for selling (e.g., Pieces, Boxes, kg). |
¶ 3.2 Pricing & Tax
Define the cost and retail prices for the item, along with its tax status.
| Field Name | Description |
|---|---|
| Cost Price * | The price you pay to acquire the item. Mandatory. |
| Selling Price * | The default price listed for customers. Mandatory. |
| Min/Max Sell Price | Set boundaries for discounts or price adjustments during a sale. |
| Is Taxable | Toggle Enabled if the item is subject to sales tax. |
¶ 3. Product Configuration: Organization
The second tab, Organization, is used to classify your product and set its base financial parameters. Proper classification ensures accurate reporting and easier inventory management.
Figure 3 — Organization and Pricing configuration.
¶ 3.1 Organization & Classification
Group your products logically to help both staff and customers find what they need.
| Field Name | Description |
|---|---|
| Categories | Select the appropriate category (e.g., Phones). You can also create a + New Category on the fly. |
| Primary Brand | The manufacturer or brand of the product (e.g., Sony). |
| Product Model | Specific model name or number related to the brand. |
| Quantity Unit | The unit used for selling (e.g., Pieces, Boxes, kg). |
¶ 3.2 Pricing & Tax
Define the cost and retail prices for the item, along with its tax status and calculation methods.
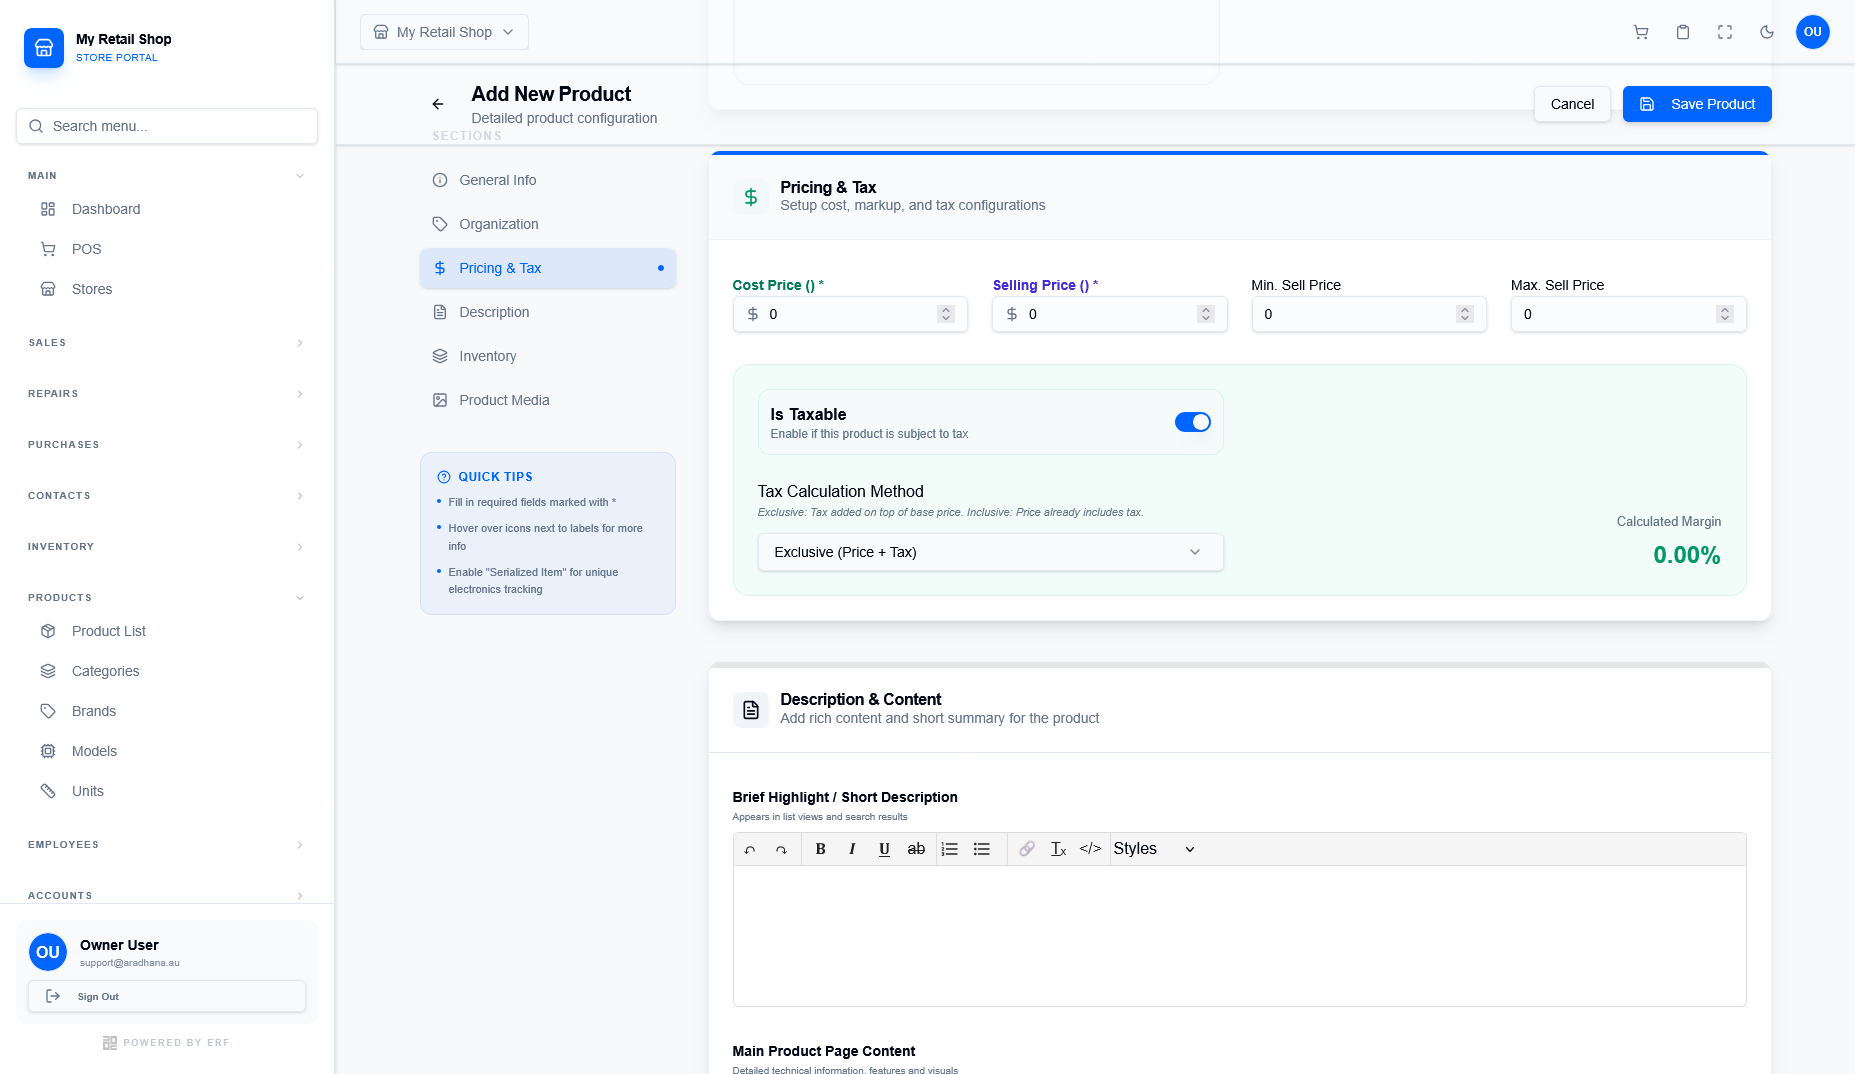
Figure 4 — Detailed Pricing and Tax configuration.
| Field Name | Description |
|---|---|
| Cost Price * | The price you pay to acquire the item. Mandatory. |
| Selling Price * | The default price listed for customers. Mandatory. |
| Min/Max Sell Price | Set boundaries for discounts or price adjustments during a sale. |
| Tax Calculation |
Is Taxable: Toggle on if this product is subject to tax. Calculation Method: Choose between Exclusive (Price + Tax) or Inclusive (Price already includes Tax). |
| Calculated Margin | The system automatically calculates your profit margin percentage as you update prices. |
¶ 4. Description & Content
Use the Description tab to provide rich content that helps both staff and (optionally) customers understand the product details.
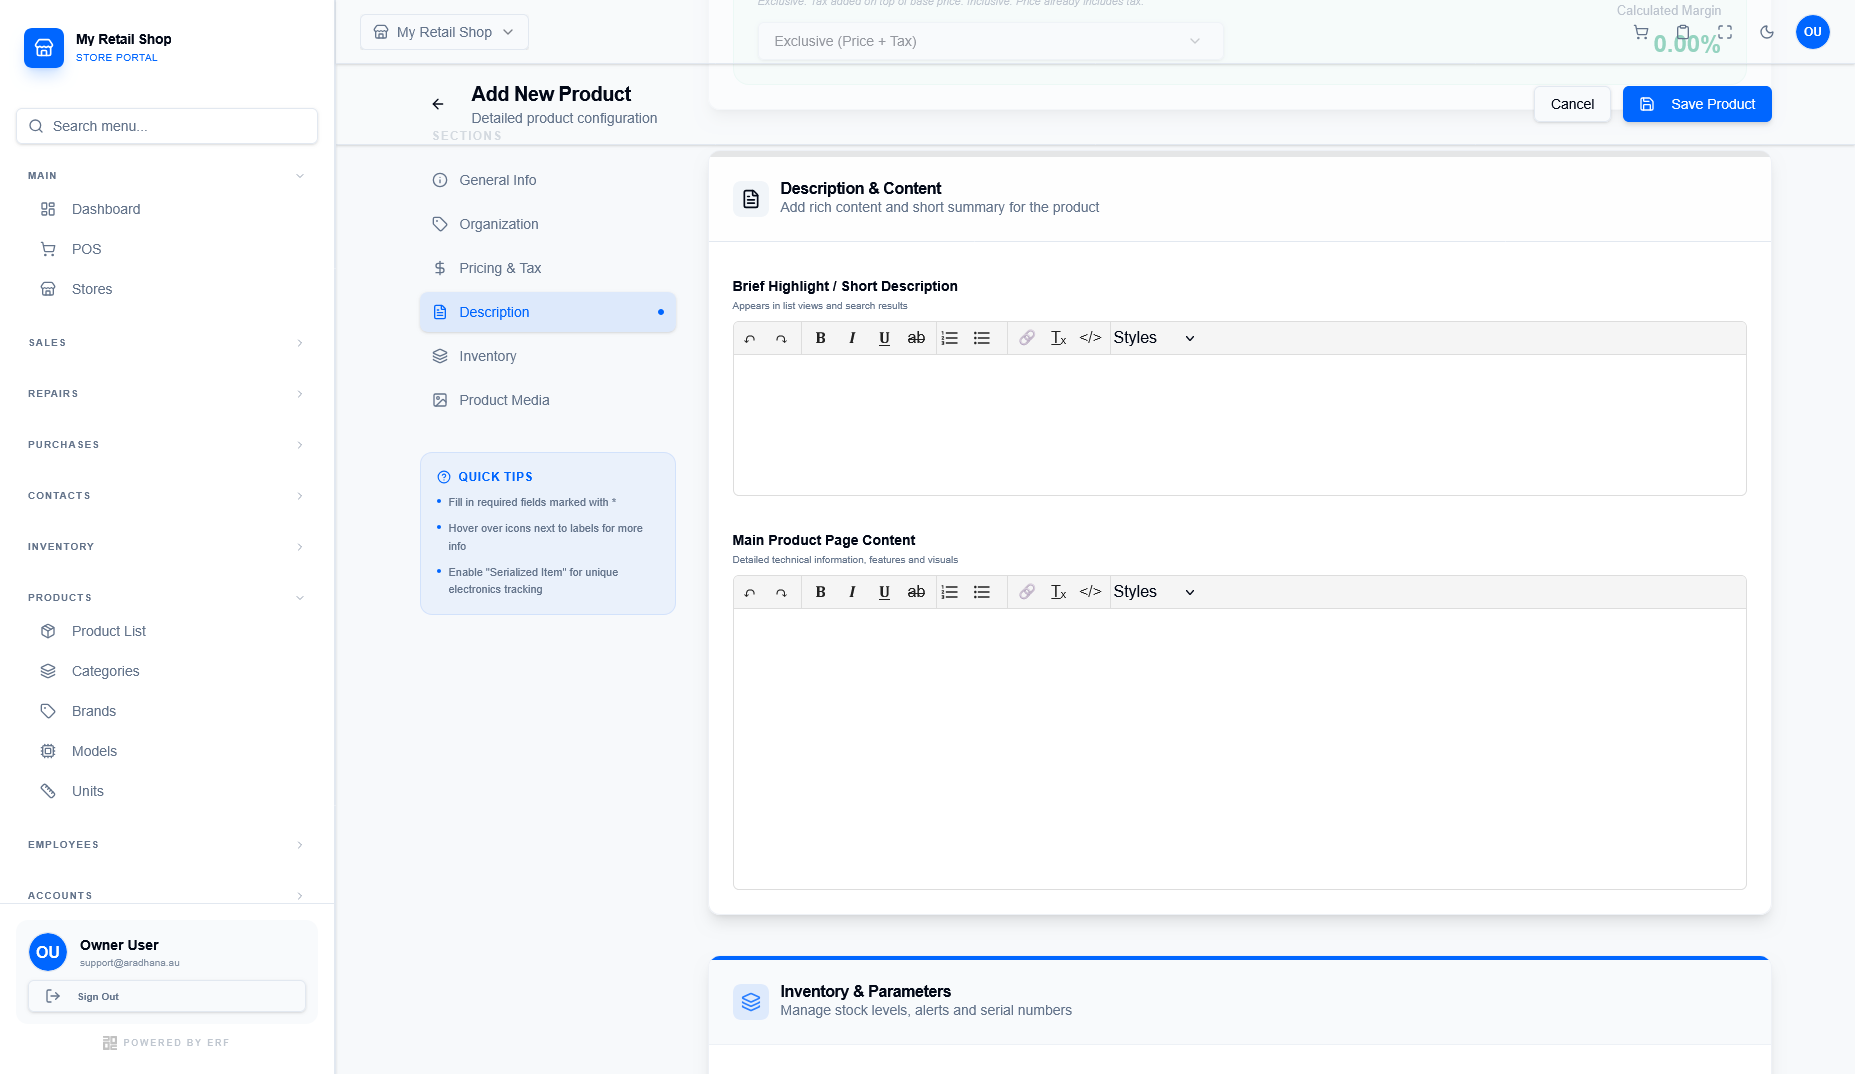
Figure 5 — Product Description editors.
- Brief Highlight / Short Description: A concise summary of the product. This often appears in list views and search results.
- Main Product Page Content: Detailed technical information, features, and specs. You can use the rich text editor to format your content (bold, lists, etc.).
¶ 5. Inventory & Parameters
The Inventory tab allows you to manage stock levels, set alerts, and define tracking methods.
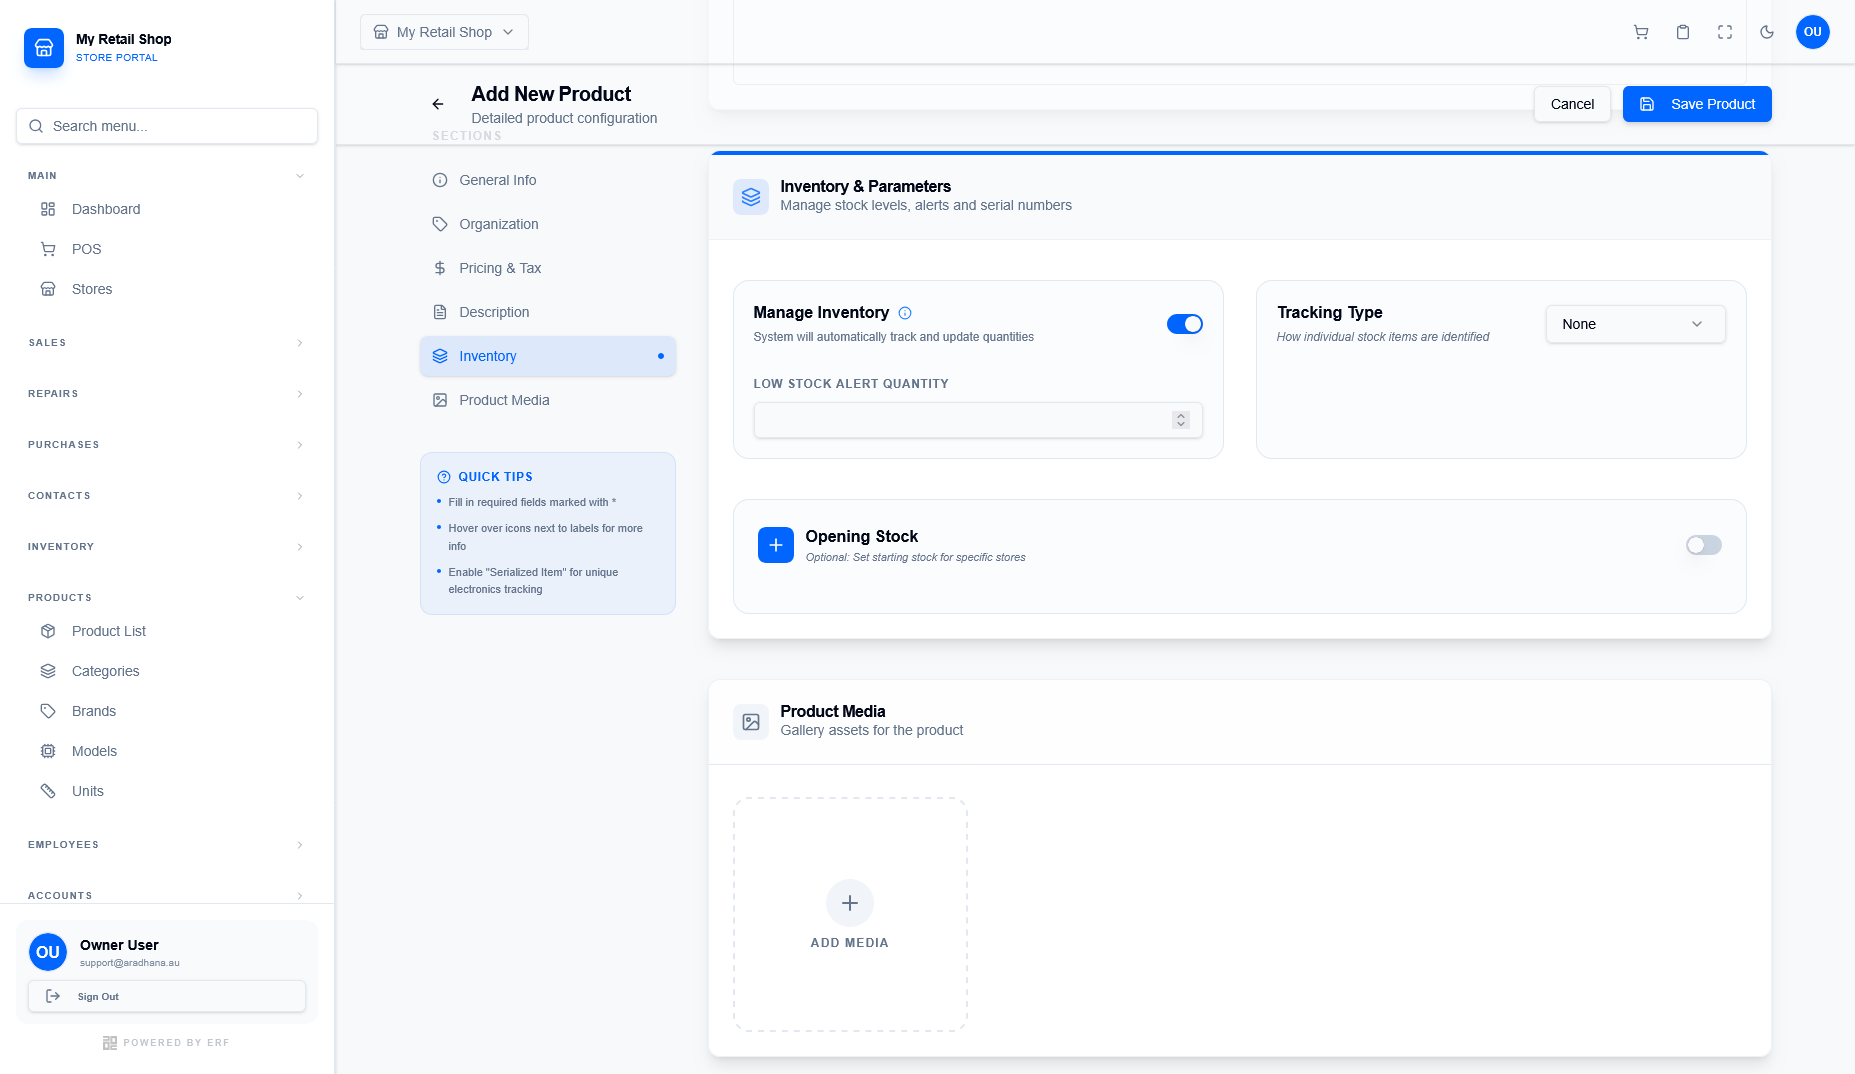
Figure 6 — Inventory management options.
| Feature | Usage |
|---|---|
| Manage Inventory | Toggle and the system will automatically track and update quantities during sales. |
| Low Stock Alert | Enter a quantity. The system will notify you when stock falls below this level. |
| Tracking Type | Choose how individual items are identified (e.g., Serialized for electronics). |
| Opening Stock | Optionally set your initial stock levels if you are migrating existing inventory. |
¶ 6. Product Media
The final tab, Product Media, is where you upload visual assets for the item.
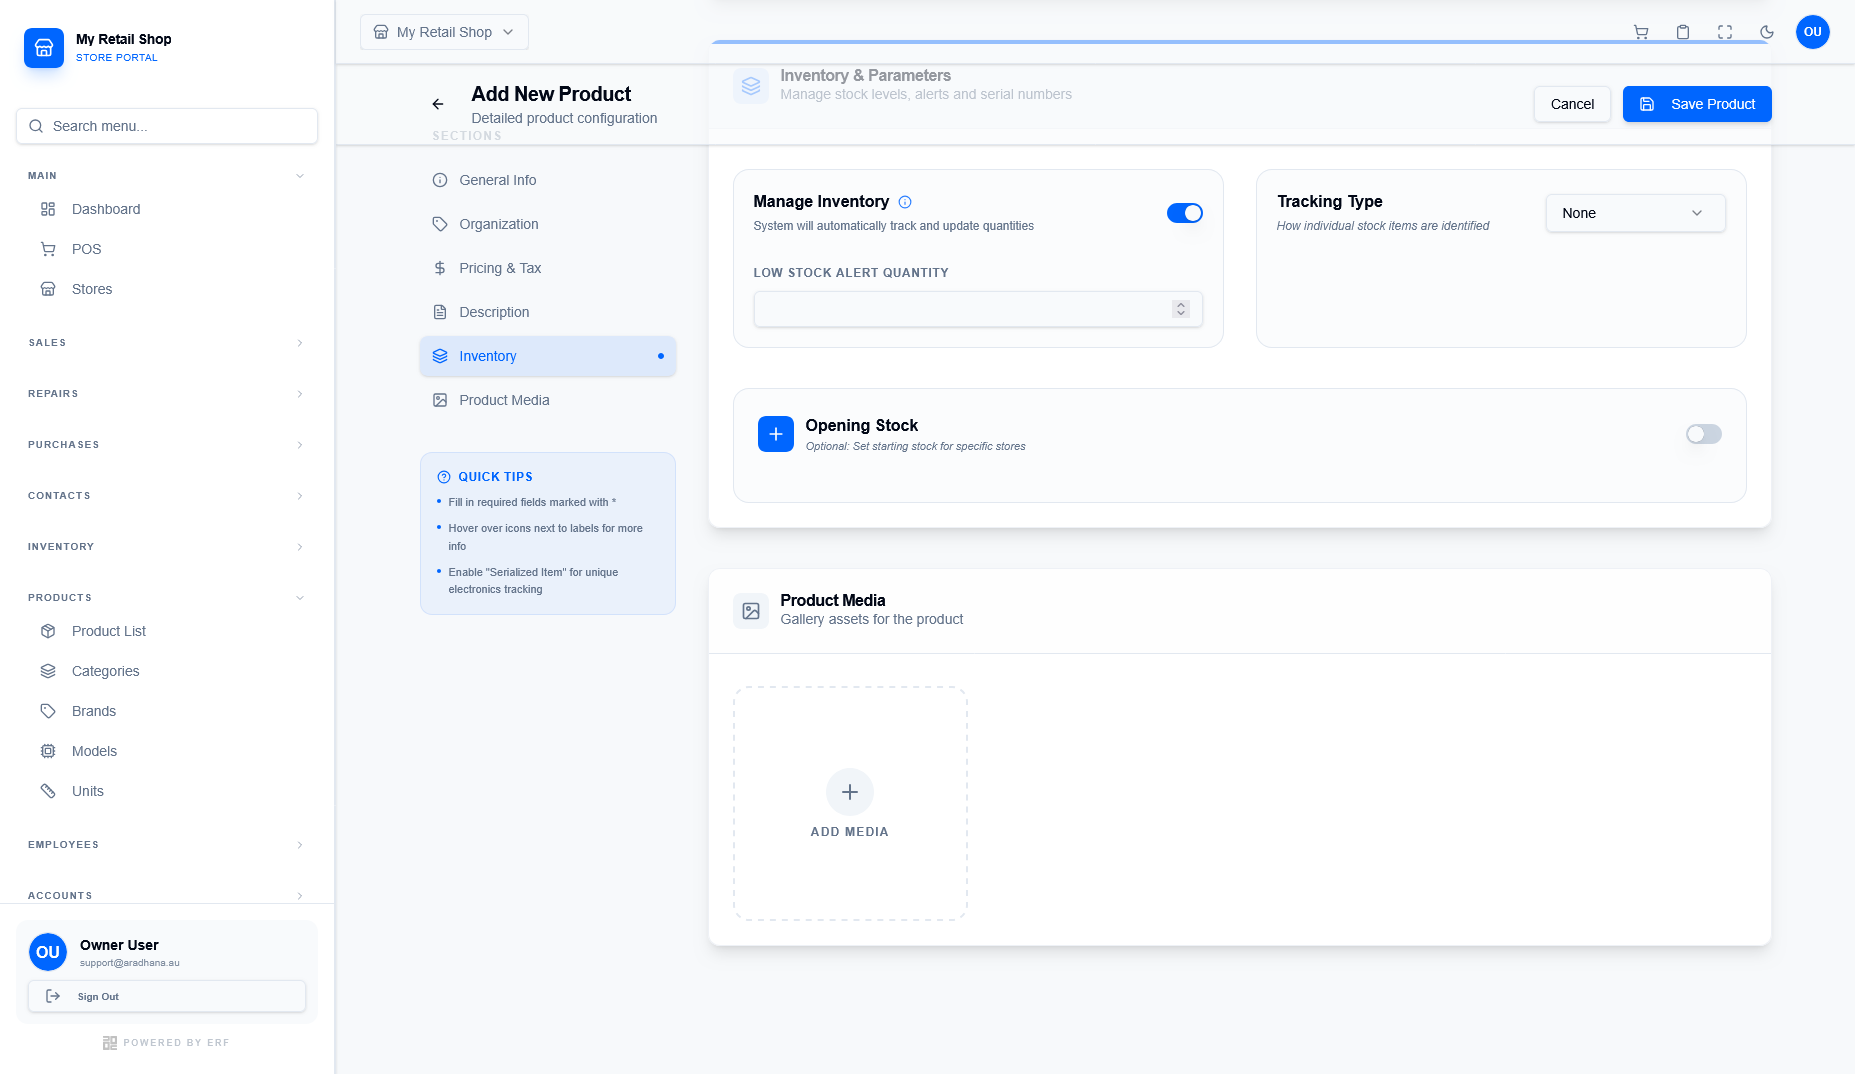
Figure 7 — Media gallery uploader.
Click the Add Media box (or the icon) to upload product photos from your device. High-quality images are recommended for POS and Catalog displays.
¶ 7. Finalizing & Saving
Review all information entered across the tabs before committing the product to your database.